Here, I will show you some Multiple-Choice Questions on Foundry. Also, I will give an overview of Foundry Technology. There will be a quiz and I hope you will enjoy appearing for the quiz.
At the end of this article, you may download the pdf format of this MCQ sheet by clicking on the downloadable pdf button.
Now, let us go to the MCQ section.

Multiple-Choice Questions or Viva Questions on Foundry Shop
- Mold is a _____.
- vertical passage
- horizontal passage
- connecting passage
- cavity ✔️
- Riser is a _____.
- vertical passage ✔️
- horizontal passage
- connecting passage
- cavity
- Runner is a ______
- the path through which hot molten material comes out of the mold
- the path through which hot molten material is poured ✔️
- connecting passage between mold and riser
- none of these
- Strike off bar is used to_______.
- mix the sand
- compact the sand
- remove the excess sand from the work zone ✔️
- none of these
- Sprue pins are tapered so that _______.
- pattern can be removed easily
- surface can be smoothen easily
- the pins can be removed easily ✔️
- none of these.
- many small holes are made on the upper surface of the cope box so that _______.
- gasses can come out ✔️
- work zone becomes smooth
- for pouring the hot molten metal
- none of these
- The sand used here is known as green sand because_____.
- it is green in color
- it contains zircon
- it contains moisture ✔️
- none of these
- Sieve is used for _______.
- plaining the surface
- for making holes on the surface
- for removing the foreign particles ✔️
- none of these
- Sprue pins are used for ______.
- making the mold
- making the cavity
- making the vertical passages ✔️
- none of the above
- The upper foundry box is known as _____.
- drag
- cope ✔️
- none of these
- The lower foundry box is known as _____.
- drag ✔️
- cope
- none of these
- The swab is used so that _____.
- sprue pins can be removed easily
- pattern can be removed easily ✔️
- gate can be made easily
- none of these
- The bentonite clay is used in inside walls of the cope box so that ____.
- sand does not stick ✔️
- working sand becomes smooth
- working sand becomes moisturised
- none of the above
- Rammer is used to ____.
- compact the surface ✔️
- mix water with the sand
- to make the holes
- none of these
- Vent rods are used for ____.
- making cavity
- making riser and runner
- making small holes on the upper surface of the cope box ✔️
- none of these
- Pattern is made of:
- metal
- wood
- both 1 and 2 ✔️
- none of these
- The tapper provided to the pattern for its removal is ____.
- machining allowance
- draft allowance ✔️
- distortion allowance
- none of these
- Green sand mainly consists of ____.
- bentonite clay
- aluminium oxide
- silica ✔️
- none of these
- Gases should be escaped from the sand through the vent holes. This property is ____.
- flowability
- permeability ✔️
- none of these
- Which of the following tool is not used in Foundry shop?
- rammer
- file ✔️
- trowel
- strike off bar
Quiz Question on Foundry Shop
You may consider this as a test of 20 marks. After completion of the test, you can check the answers and can come to know how much you are prepared.
For better clarification of the answers of the MCQ questions, you may read the following text.
Overview
The Foundry shop is the place where metal castings are produced.
In the Foundry shop, you can perform the following activities:
- Molding
- Melting
- Casting
Here is the easiest example which will be very easy for you to understand the entire technique involved in the foundry shop.
You can take a stem of a papaya tree of 12 cm in length. Then seal one end with paper. Through the other end, you pour liquid wax. In this way, you fill-up the entire stem with wax.
Then, you wait for some time till the wax becomes solid. After that, you remove the stem and thus you will make the solid wax separated from the stem. After removing the stem completely, you will get a candle.
Here, in this example, you have to collect/make the three things:
- Molding i.e. the hole within the papaya stem in which you have to pour the liquid wax.
- Melting i.e. making a liquid wax
- Casting i.e. producing the candle.
Under this experiment, you will make the green sand mould only i.e. the first part.
What is green sand?
The green sand also named foundry sand contains silica, iron oxide, phosphoric acid, moisture, and some other materials.
Why the name is green sand?
The name of the sand is green not because of its green colour but because it contains moisture.
Benefits of green sand
Benefits of green sand are:
- You can use green sand as a soil conditioner also.
- It helps to hold the shape as per requirement in sand casting.
Main components of green sand
High quality green sand consists of the following components:
- Silica sand, chromite sand, or zircon sand-75 to 85%
- Bentonite clay- 5 to 11%
- Water- 2 to 4%
However, low quality green sand contains much amount of clay. It may be up to 30%.
Job: making a green sand mold in a Foundry shop
Here, students will learn how to make a green sand mold in a Foundry shop and will be familiar with the different types of tools used in the Foundry shop.
A mold is a hole on the sand within which liquid metal is poured. Besides the mold, there will be a hole at the top. This vertical passage is called a runner. Through the runner, molten metal is poured.
Runner and mold are connected through a horizontal passage. At the top of the mold, there is another vertical passage. It is called a riser. Excess metal comes out of the riser. Then, students will come to know that they should stop pouring the molten metal.
When the hot molten metal becomes cold, it shrinks. So, there may be a shortage of pouring metals. The riser can compensate for this shortage. Thus the riser acts as a reservoir.
Name of the Foundry shop Tools
- Hand rammer (wooden)
- Sieve
- Trowel
- Sprue pin
- Plainer
- Gate cutter
- Sleek
- Draw spike
- Vent rod
- Swab
- Cope & Drag box
The function of the Tools in a Foundry shop
Hand rammer
Students will use the hand rammer to compact the sand by striking it in the molding box.
Sieve
For removing the foreign materials from the sand, students will use a hand riddle or sieve.
Shovel
It is a steel pan fitted with a long wooden handle. Students will use it in mixing and conditioning the foundry sand.
Trowel
The material of the trowel is iron and that of the handle is wood. Students will use it to make the surface flat.
Sprue pin
With the help of sprue pins, students will make holes on the sand. Sprue pins are tapered rods made of wood or iron.
Strike off bar
Students will remove the extra sand from the surface with the help of a strike-off bar. It is a flat bar. The material of the strike-off bar is wood or iron.
Mallet
Students will use the mallet while removing the sprue pins from the sand.
Students will strike the sprue pins slowly by the mallet so that they can be removed from the surface without damaging the walls of the holes.
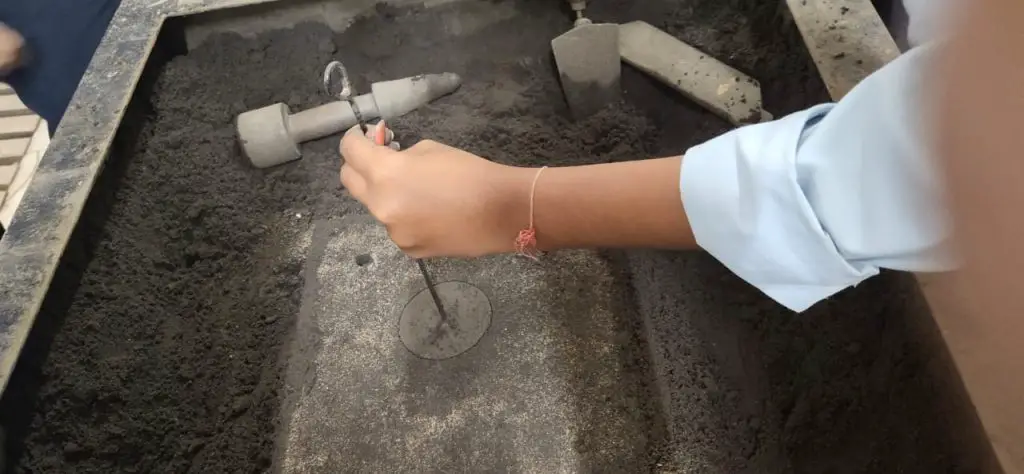
Draw spike
Students will use a draw spike for removing the pattern without damaging the walls of the cavity. It is a tapered steel rod. In the end, there is a ring or a loop.
Gate cutter
Students will make the connection between runner and mold with the help of gate cutter.
Sleek
For repairing the surfaces/ walls of the cavity which are being damaged while removing the pattern, students will use sleeks that look like a spoon.
Vent rod
It is a thin steel rod or wire that is used to make small holes on the sand of the cope box. These small holes are known as vent holes. These holes are made so that the gases can escape during the pouring of hot molten metal.
Lifter
The material of the lifter is steel. It may be of various lengths and widths. One end of the lifter is bent at a right angle and is used for removing loose sand from the mold cavity.
Swab
It is a small hemp fiber brush and used to moisturise the edges of the sand mold before removing the pattern.
Cope & Drag box
Two number boxes are used in the foundry shop. These are called foundry boxes. The names of these boxes are- cope and drag. The upper box is the cope box and the lower box is the drag box.
Different types of Sands used in Molding in Foundry shop
1. Green sand
The green sand is
- natural sand.
- silica sand mixed with moisture and clay.
- soft, light, fine, and porous.
It can also hold a shape if it is taken in hand and is compressed.
2. Dry sand
After making the mold, the green sand is dried or baked in the oven. This is called dry sand.
For larger castings, this sand is used as it possesses more strength, thermal stability, and rigidity.
3. Loam sand
It is a thin plastic paste that contains more moisture and more clay.
Here, patterns are not used. Mold gets the shape by sweeps.
This is used for large grey iron castings.
4. Facing sand
Facing sand that possesses high strength and refractoriness, is formed and is given around the surfaces of the mold.
5. Backing sand
Backing sand or floor sand that is used to back up the facing sand fills the whole volume of the molding flask.
6. Parting sand
Greensand should not stick to the pattern. Cope and drag boxes should be separated and traced easily. Parting sand helps in these.
It is clay free silica sand. It is also used as parting dust.
7. Core sand
For making cores, core sand is used. This is sand where amount of silica is high along with oil binders.
Procedure
1. Mixing the sand by water
Sand is kept on a table. Here, the table will act as base of the molding.
First, spray some water on the green sand. Then, students should mix the sand by water.
2. Ramming with pattern
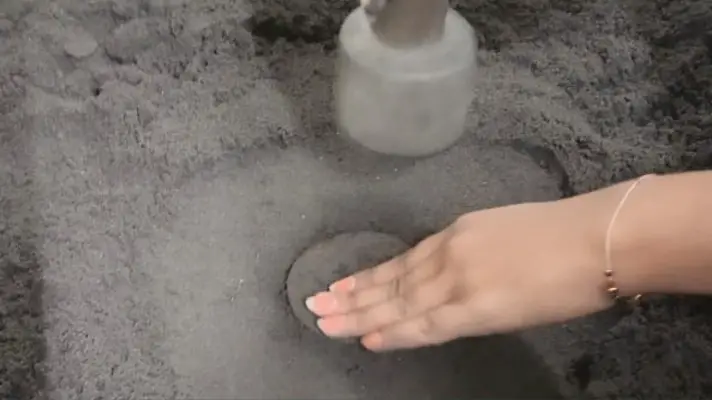
Students will ram the sand with the help of a hand rammer. After that, they will put the pattern on it. The pattern is the replica of the product to be manufactured.
3. Making the surface plain.
Students will make the surface plain where mold will be produced with the help of a strike-off bar and trowel. After that, students will remove the excess sand from that surface.
Students should ensure that there is no lump in the sand of the surface.
4. Putting the cope and drag box
As the table itself is the base, students will not use the drag box here. So, students will use only cope box.
They will put the bentonite clay on the inner surfaces of the cope box to avoid the sticking of the green sand.
Then, students will put that cope box on the plain surface.
5. Sand filling and Ramming
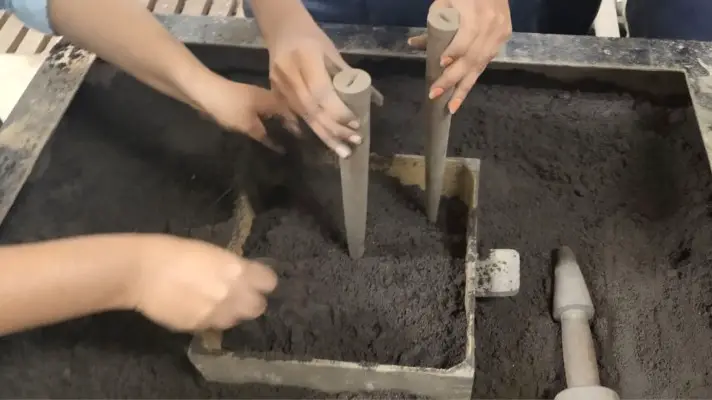
Students will fill the cope box with sand and then they will ram the sand; while the pattern will be kept in a fixed position by holding it with a finger. Thus, they will make a flat surface around the pattern.
Then, they will put the sprue pins- one pin at the top of the pattern and the other pin just a little distance away from the pattern.
One student will hold the sprue pins and another student will fill the box with sand and ram it.
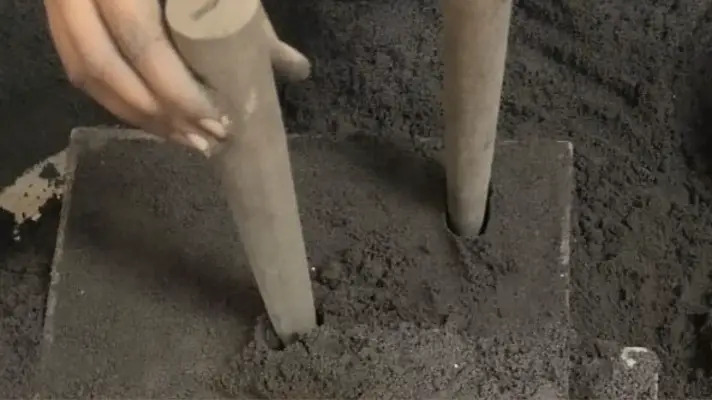
Students will vent the surface after ramming.
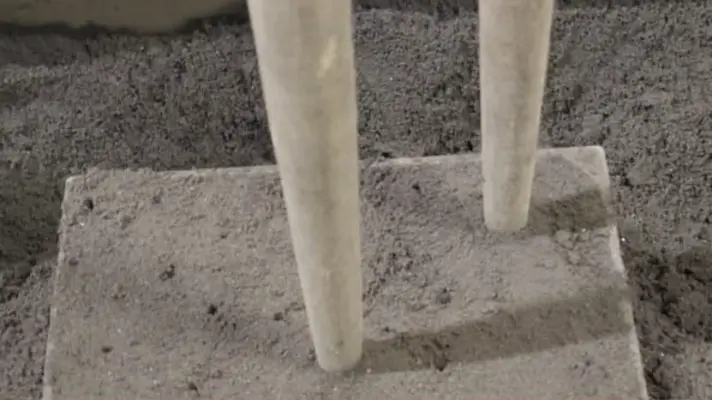
6. Removing of sprue pins, and the Cope box
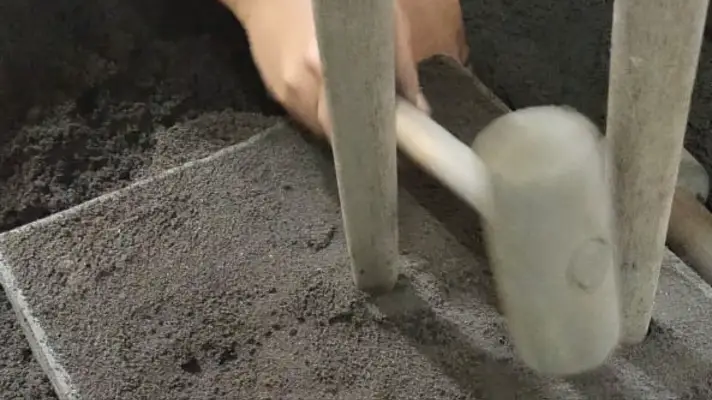
After some time, one student will hold the sprue pins and another student will remove the sprue pins with the help of a mallet.
Before removing the cope box, students should pour parting sand in one corner so that they can trace the orientation or position of the cope box.
Then, students will pick the cope box and will keep it beside.
7. Removing of Pattern
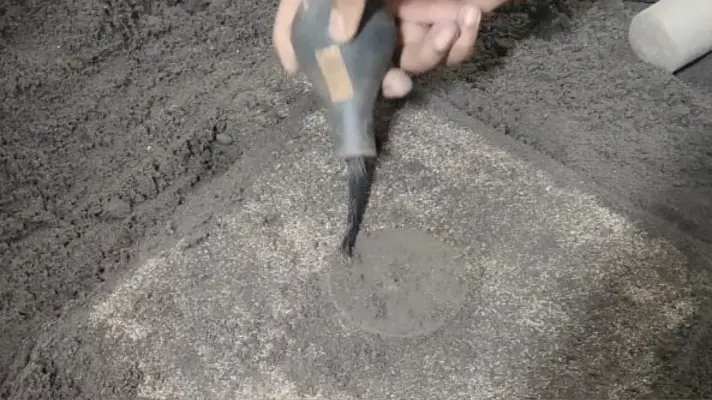
After removing the cope box, students will see that the pattern is on the flat surface on the table. Then, they will spray water with the help of a swab on the surface of the pattern.
One student will put the draw spike on the surface of the pattern and slowly pick the pattern. Then he/she will keep it besides.
Thus, students will remove the pattern.
8. Cutting the gates
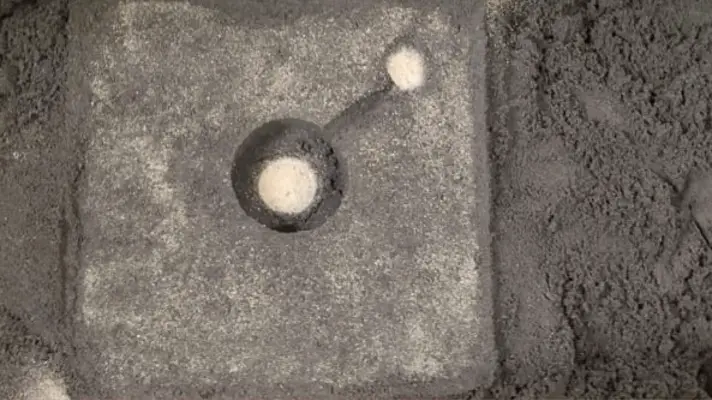
Students will see one big cavity and a small hole that is in the bottom portion of the vertical passage i.e. runner. And the big cavity is the mold.
Now, students will connect this small hole with the big cavity so that when they will pour hot molten metal through the vertical passage, it can reach the cavity.
So, students will make a gate from this small hole to the mold. They will do this by gate cutter.
Checking and finishing
After making the gates, students have to check the surfaces of the gates. They can repair the surfaces with the help of sleek.
Finally, students will check the entire surface finish.
Thus, the students will prepare the green sand mold.
Now students can put the cope box once again to check whether the cavity, the riser, and the runner all are in order. They can pour some parting sand through the riser and can check whether it has reached the cavity.
Safety rules
- Always wear leather shoes, not sandals.
- Don’t wear loose clothes, wristwatch during the job.
- Know the correct way of ramming the sand.
- Hold the sprue pins straightway.
- Keep patience while removing the sprue pins and patterns.
The multiple-choice questions mentioned here are the basic questions on Foundry Shop. This will help you in clearing the viva during the semester examination. If you have any queries, write to me in the comment box so that I can clarify. Best wishes!


